Connecting your Oracle POS to a compatible acquirer terminal.
Get ready
Before you begin, make sure that the merchant has:
- A compatible Oracle POS that’s setup and working. The Linkly Bridge for Oracle works with Simphony v2.9+, RES 3700 v5.5+ or e7 POS v.4.4.
- Administrator access to Oracle management applications. If the merchant doesn’t know the required username and password they will need to be in contact with someone that does. Linkly Support can be contacted to complete set up if a person with administrator access is not available.
- The standard Linkly software from the Linkly website (with Linkly EFT-Client v4.8.0+) installed and running.
- Standard Linkly EFT Server credentials which must be entered into the Linkly EFT-Server.
- An internet connection on the computer where the Linkly EFT-Server is running.
Start by installing the Linkly Bridge for Oracle
- Navigate to the Linkly software downloads page.
- Select ‘Download’ under the 'Linkly Bridge for Oracle’ heading.
- Launch the installer and follow the installation steps. It’s only three clicks.
- The Linkly Bridge for Oracle will launch automatically after installation is complete.
If needed, check the Oracle interface type
The Oracle POS uses the Simphony Payment Interface (SPI) or the Oracle Payment Interface (OPI). The merchant may already know which payment interface is being used by the Oracle POS. If needed, follow the steps below to confirm which Oracle interface is being used.
- Launch and login to the Oracle Enterprise Management Console (EMC)
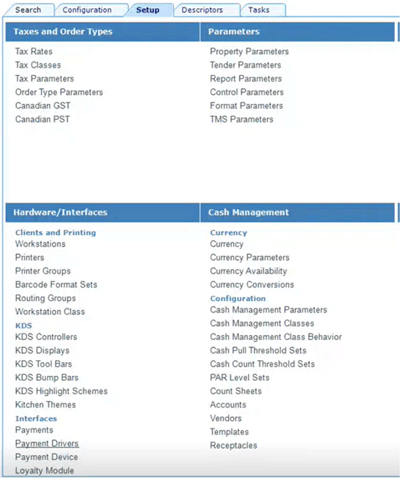
- Select the ‘Setup’ tab and under ‘Hardware/Interfaces' click ‘Payment Drivers’ (under 'Interfaces’).
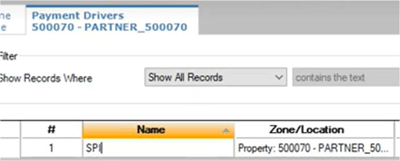
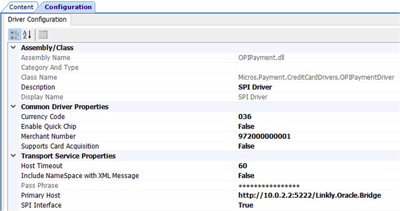
- Double click on the payment driver under the ‘Payment Drivers’ tab.
- Open the ‘Configuration’ tab and navigate to ‘SPI Interface’ under ‘Transport Service Properties’. If ‘SPI Interface’ is ‘True’, follow the steps for Simphony Payment Interface (SPI). If ‘SPI Interface’ is ‘False’, follow the steps for Oracle Payment Interface (OPI).
Update Oracle POS settings
Simphony Payment Interface (SPI) The following steps should be completed for customers using the Simphony Payments Driver (SPI).
- Launch and login to the ‘Oracle Enterprise Management Console’ (EMC).
- Select the ‘Setup’ tab and under ‘Hardware/Interfaces' click ‘Payment Drivers’ (under 'Interfaces’).

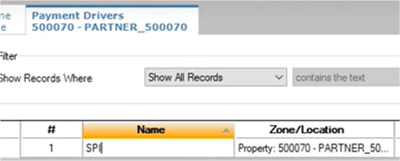
- Double click on the ‘SPI’ payment driver under the ‘Payment Drivers’ tab.
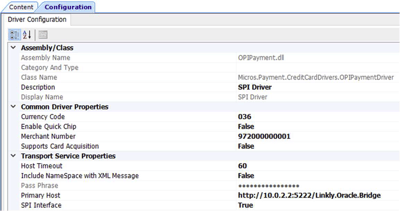
- Open the ‘Configuration’ tab and navigate to ‘Primary Host’ under ‘Transport Service Properties’. Configure the ‘Primary Host’ of the ‘SPI Payment Driver’ to be: http://localhost:5222/
Oracle Payment Interface (OPI)
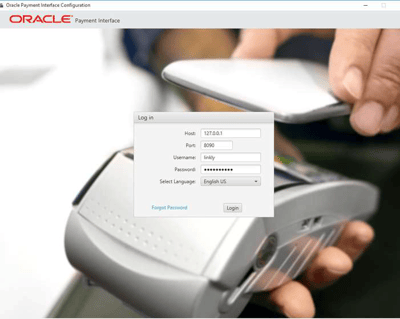
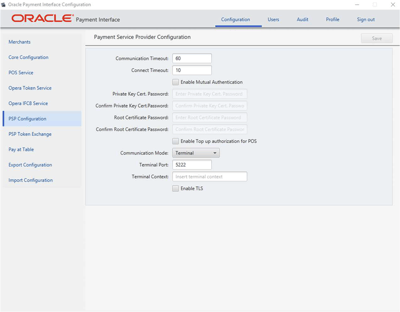
- Launch the ‘Oracle Payment Interface Configuration’ application.

- Login to the ‘Oracle Payment Interface Configuration’ application.
- Select the ‘PSP Configuration’ tab and set:
- ‘Communication Mode’ to ‘Terminal’, and
- ‘Terminal Port’ to ‘5222'.
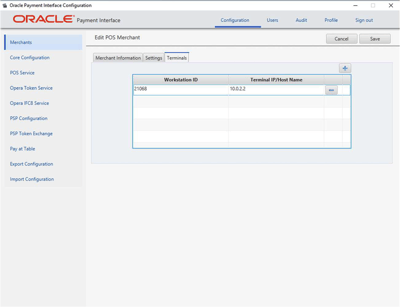
- Select the ‘Merchants’ tab and select the profile for configuration.
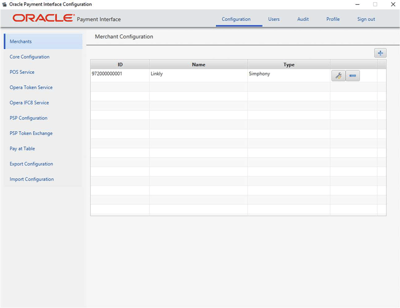
- Select the ‘Terminals’ tab and add the Oracle Workstation ID and corresponding IP address or hostname for each Oracle POS, as confirmed by the merchant.
This information needs to be entered only once into the Oracle Payment Interface, however all instances of the Oracle POS to be integrated with terminals must be entered.
The merchant should provide static/DHCP reserved IPs or host names are recommended, to ensure the POS connection remains intact.